Client Portal Setup: Your First Twenty Minutes


Client Portal Setup: Your First Twenty Minutes#
We've activated your GHL portal. The pipelines, automations, follow-up sequences and landing pages will be built out here.
Five things need you, because they involve your account details. We will not have access to any of your accounts when you add them here. These will allow us to run branded funnels, send automated email from your domain, and schedule appointments on your calendar:
- Log in and secure the account
- Fill in your business details
- Point
fnl.at the portal for your funnels - Point
mail.at the portal for your emails - Connect your calendar
Part 1. Logging in#
Step 1. Find the invitation#
We sent an invitation to the email address you gave us, with a link to set your password.
If it isn't in your inbox, check spam and promotions. It looks like this:

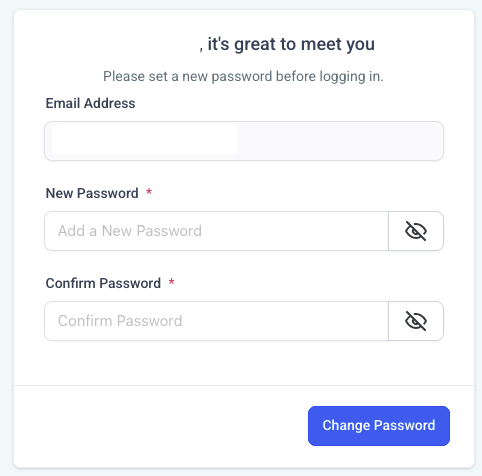
Step 2. Set a password and bookmark the login page#
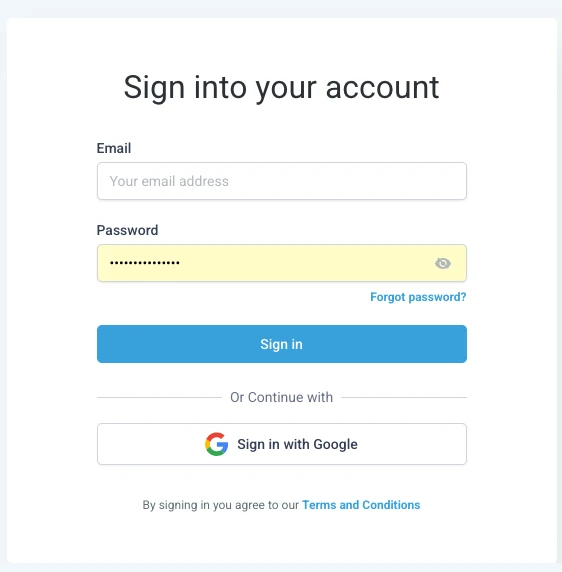
Follow the link, set a password, and maybe bookmark the page (login.idaritysolutions.com).
Step 3. Turn on two-factor authentication#
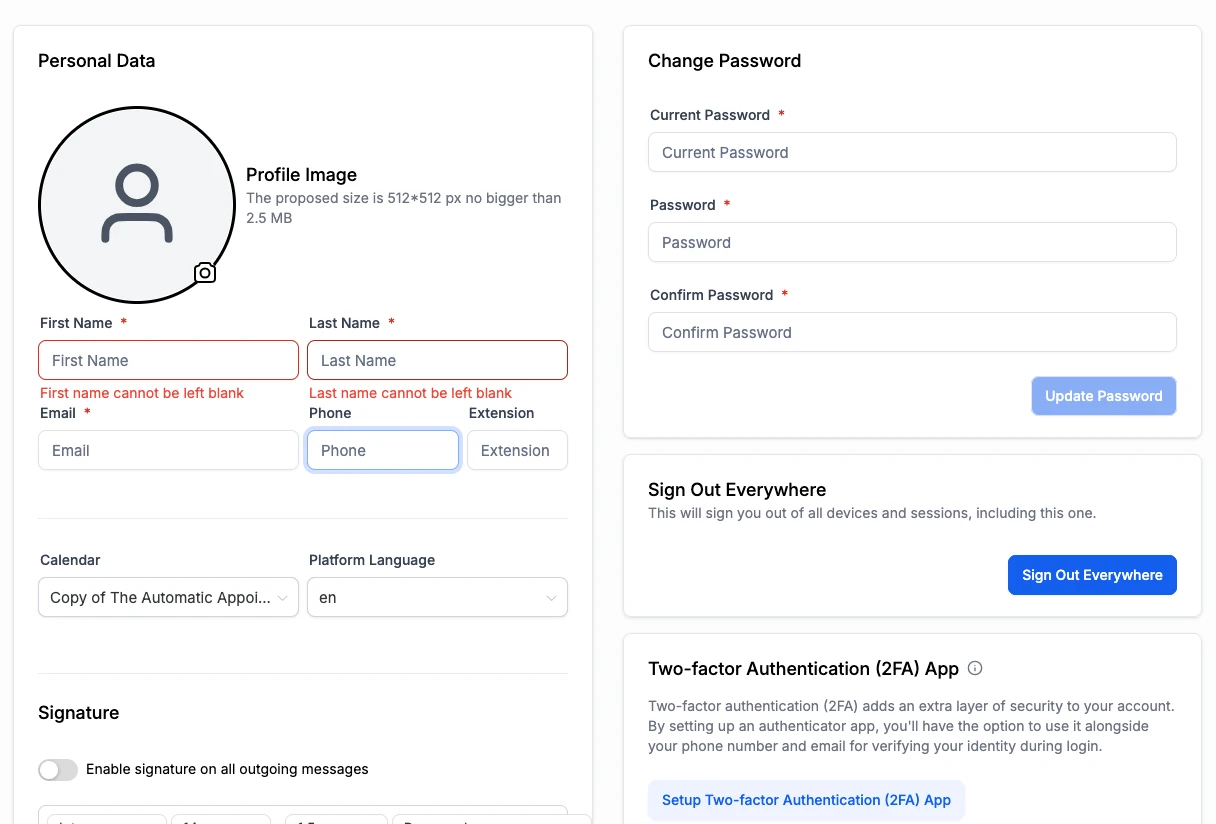
This portal holds your customer conversations and contact records so we will want to use 2FA.
Click your profile in the bottom left, then My Profile.
Step 4. Add your mobile number#
Add a number so new lead notifications reach you by text.
Part 2. Your business details#
Go to Settings → Business Profile.
What you enter here gets applied across the whole account. It appears in the footer of every email the system sends, and in the compliance registration required before the platform will send text messages on your behalf.
Fill in all of it, not just the required fields.
Step 5. General information#
| Field | What to enter |
|---|---|
| Business name | Your trading name, the one customers know |
| Legal name | Your registered entity name, exactly as filed |
| Business email | A monitored address on your own domain |
| Business phone | The number you actually answer |
| Website | Your main site, with https:// |
| Logo | Square, transparent background, at least 512 by 512 |
| Niche | Pick the closest match, it affects some defaults |
| Currency | USD for US businesses |
Notes:
Legal name has to match your filings exactly. It's used for message compliance registration, and a mismatch there is one of the more common reasons a registration gets rejected and has to start over.
Business email should be a real monitored inbox on your domain, not a personal address and not a no-reply. Replies to automated emails land there.
Step 6. Address and time zone#
Verify your physical business address. Street, city, state, postal code, country.
This has to be a real address. It goes in the footer of marketing emails because anti-spam law requires a physical address there, and it feeds message compliance registration. A PO box is acceptable in most cases.
Then set the time zone, which sits on the right side of the screen under the address fields.
(Every appointment, scheduled message and report uses this timezone)
Part 3. The funnel subdomain (fnl.)#
Your landing pages run on a web address you own, so traffic and tracking stay under your domain rather than ours.
Use fnl.yourcompany.com, not your root domain. Your main website stays untouched.
Step 7. Start the connection#
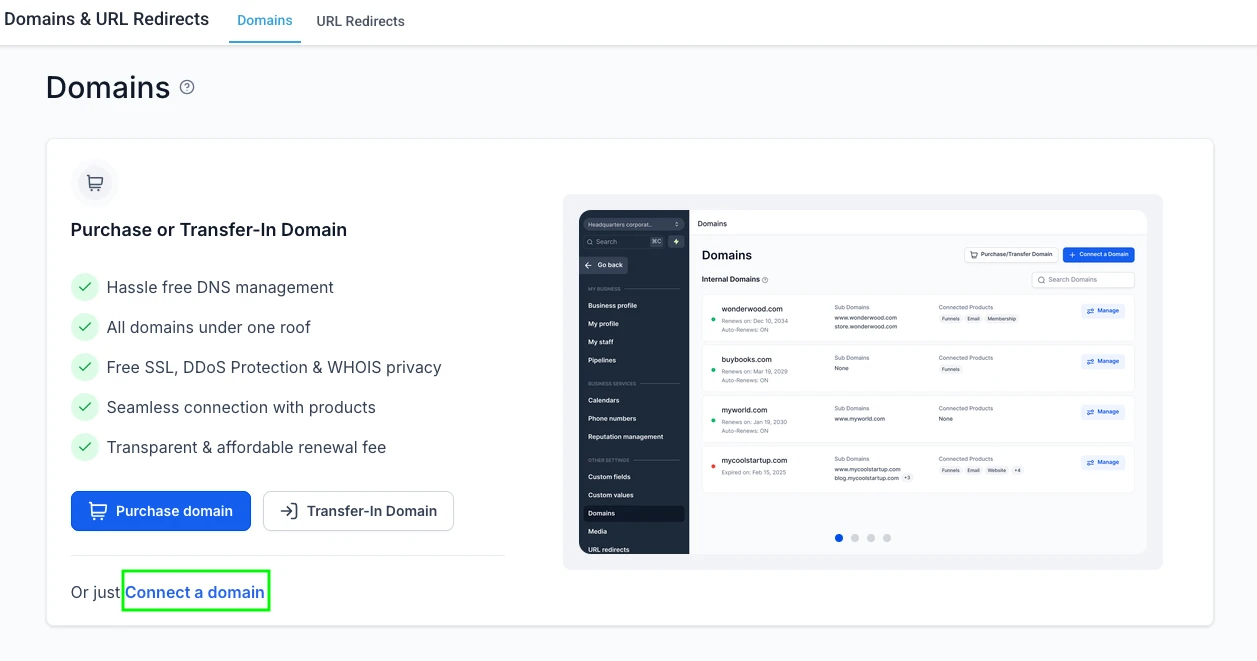
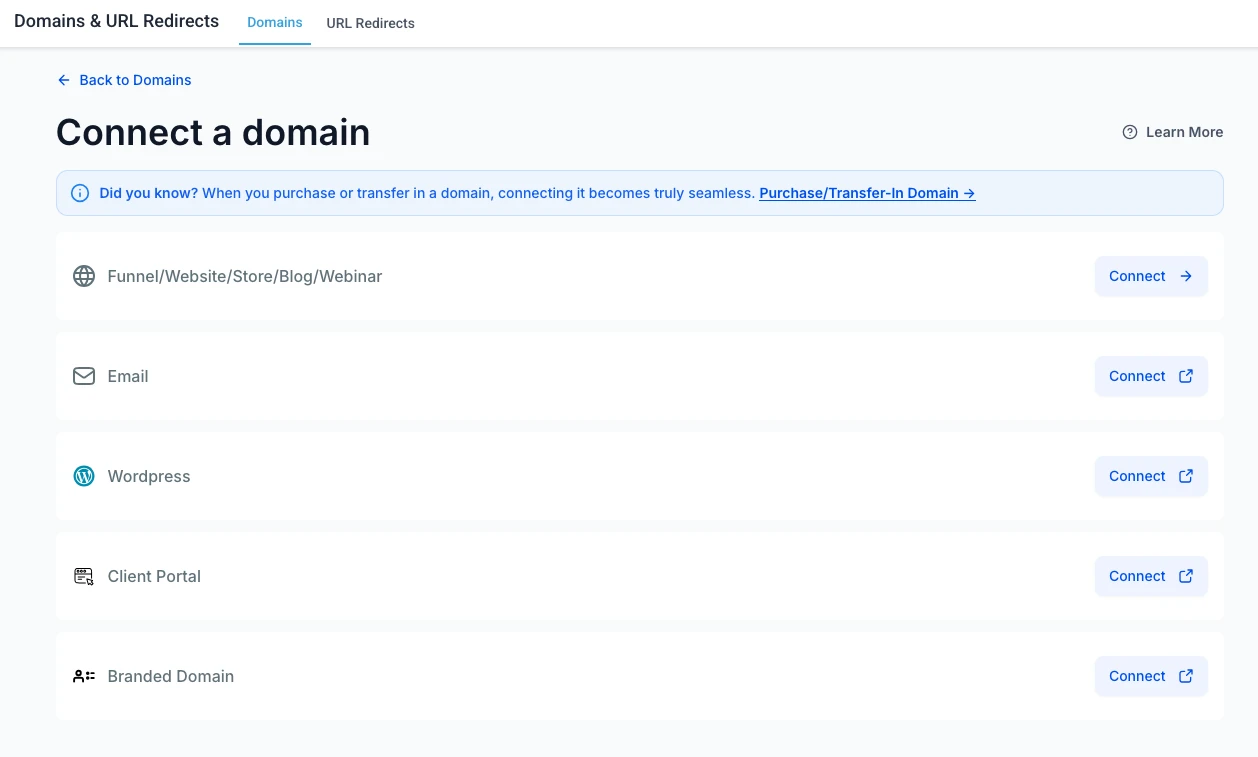
Go to Settings → Domains. Depending on your menu it may appear as Domains & URL Redirects, or under Sites → Settings → Domains.
Click Connect a Domain, choose Funnel/Website as the product, and enter fnl.yourcompany.com.
Step 8. Take the automatic path if it's offered#
If your domain is registered with GoDaddy, Google Domains or Cloudflare, click Authorize, sign in to that provider, and approve. The records get added for you.
Step 9. Or add the record yourself#
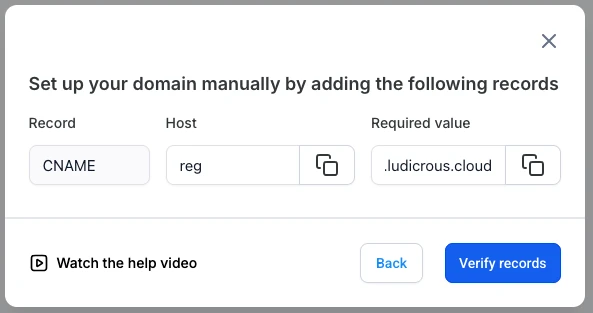
Anywhere else, Namecheap, Bluehost, your web host, choose to add records manually. For a subdomain it's a single CNAME entry.
Sign in wherever your domain is registered, find DNS management, and add exactly what the portal shows.
| Field | What to enter |
|---|---|
| Type | CNAME |
| Host or Name | fnl |
| Value or Points to | sites.ludicrous.cloud |
| TTL | automatic, or 3600 |
Notes:
The host field wants the subdomain on its own. Most registrars want fnl, not fnl.yourcompany.com. Enter the full address and you end up with fnl.yourcompany.com.yourcompany.com.
Step 10. Wait, then verify#
DNS changes take anywhere from a few minutes to a few hours, occasionally up to a day.
Click Verify. If it fails, wait ten minutes before trying again.
If it still says pending after 24 hours, send us a screenshot of what you entered.
Part 4. The email subdomain (mail.)#
Follow-up emails, appointment reminders and nurture sequences go out from mail.yourcompany.com. Sent from your own domain, they reach the inbox. Sent from a shared domain, a lot of them land in spam.
Your regular email is not affected. The records below only touch mail., so the inbox you use every day on yourcompany.com (Google Workspace, Microsoft 365 or anything else) keeps working exactly as it does now.
Step 11. Add the sending domain#
Go to Settings → Email Services, open the Dedicated Domain and IP tab, and click Add Domain.
Enter mail.yourcompany.com.
Step 12. Add the five records#
The portal now shows the five records mail. needs. Two TXT, one CNAME and two MX.
If your domain is with GoDaddy, Google Domains or Cloudflare, click Authorize, sign in to that provider, and approve. The records get added for you. When the provider tab says it's done, close it to go on to verification.

Anywhere else, sign in where your domain is registered and add these five records yourself.
| Type | Host or Name | Value or Points to |
|---|---|---|
| TXT | mail |
v=spf1 include:spf.leadconnectorhq.com include:mailgun.org ~all |
| TXT | mx._domainkey.mail |
copy from your screen, it starts k=rsa; p= |
| CNAME | email.mail |
mailgun.org |
| MX | mail |
mxa.mailgun.org |
| MX | mail |
mxb.mailgun.org |
Set TTL to automatic, or 3600. If the MX records ask for a priority, use 10 for both.
Notes:
The second TXT record is yours alone. It's the key that proves the email really came from you, and it's different for every account. Copy it from your own screen with the copy button, never from someone else's setup. It's long, and one missing character breaks it.
Same host-field rule as before. Enter mail, not mail.yourcompany.com. If your registrar adds your domain automatically, the full address becomes mail.yourcompany.com.yourcompany.com and verification fails.
GoDaddy saves one record at a time. Click save after each record, not once at the end.
Check for a DMARC record. Gmail and Yahoo now expect one on any domain sending automated email. If your domain doesn't have one, add a TXT record with host _dmarc and value v=DMARC1; p=none;. If it already has one, leave it alone.
Step 13. Verify#
Click Verify. Like the funnel subdomain, it can take a few hours to go through, occasionally a full day.
If some records verify and others don't, check those rows one by one against the screen. If it's still failing after 24 hours, send us a screenshot of both the portal and your DNS records.
Part 5. Connecting your calendar#
This turns a form fill into a booked call on your real calendar.
One thing to know first. Calendar connections are tied to individual user profiles, not to the account. If more than one person takes calls, each of them will connect their own calendar.
Step 14. Open calendar connections#
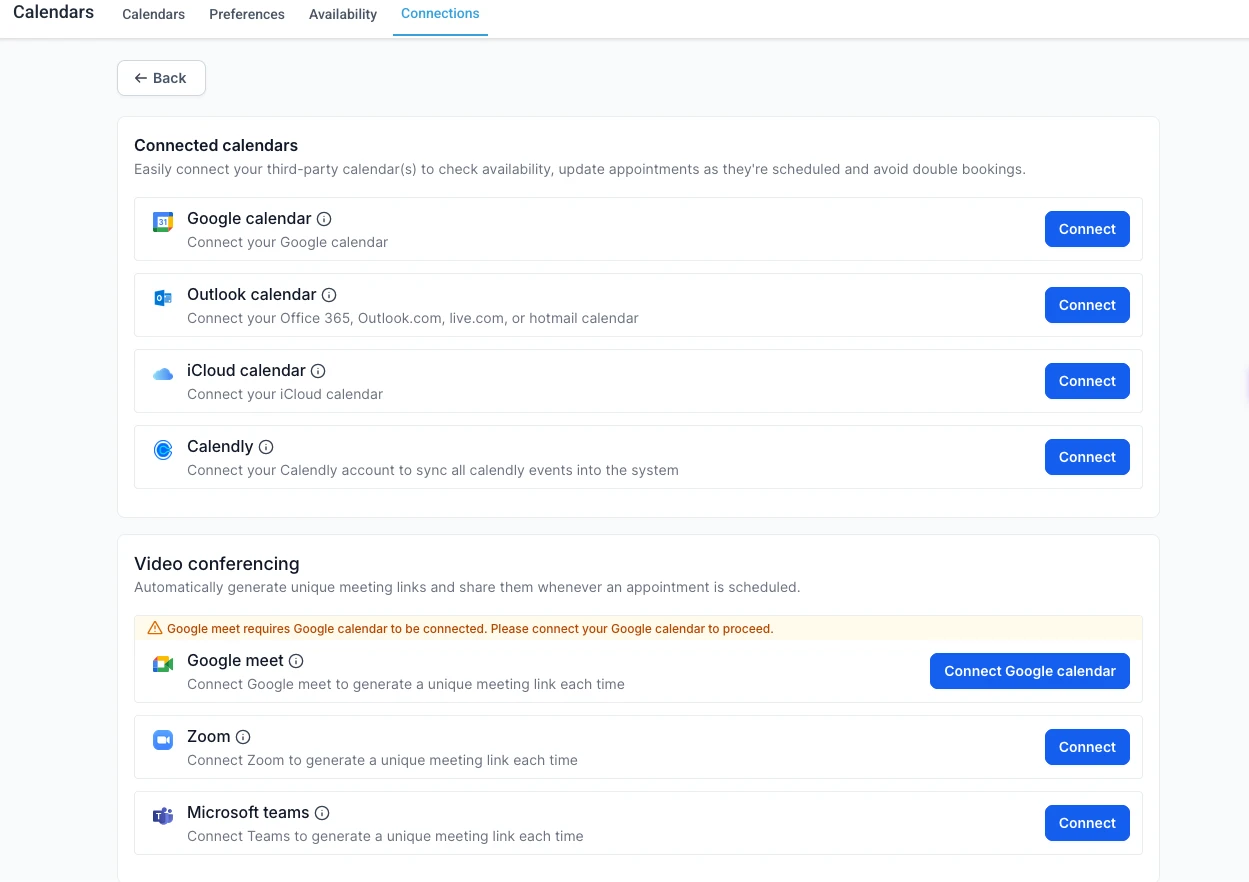
From the left navigation click Calendars, then Calendar Settings in the upper right, then the Connections tab.
You can also get there from Settings → Calendars.
Step 15. Connect Google, Outlook, iCloud or Calendly#
Click + Add New, then Connect beside your provider. Google, Outlook, iCloud and Calendly are supported.
Sign in, then accept every permission it asks for, including calendar read and write, profile, and email.
This is the step people get wrong. Google lets you approve some permissions and decline others. Decline write access and the connection appears to succeed, then silently fails to sync.
If you see a sync warning later, go to Settings → Integrations, find your provider, and use Reconnect.
Step 16. Set your availability#
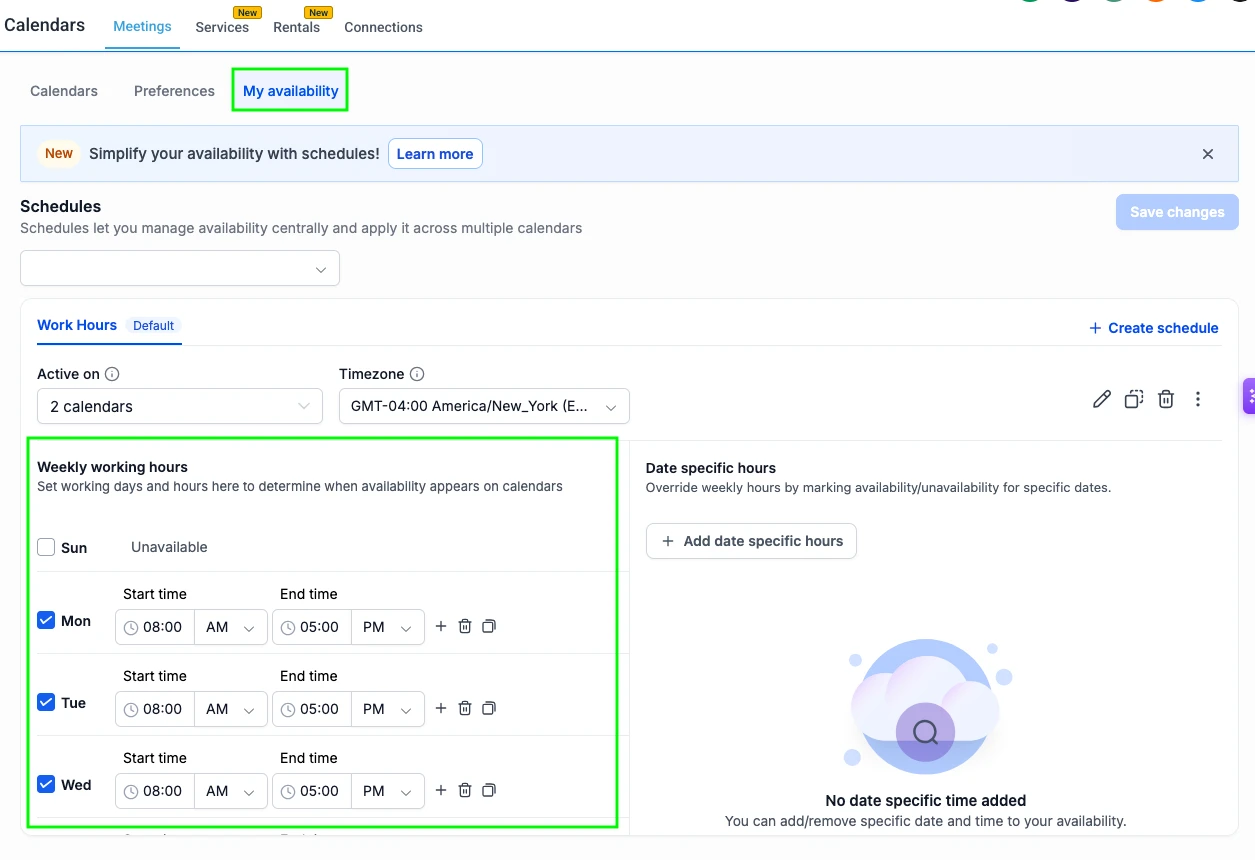
Click on 'My Availability' on the top right and set your calendar times.
Be honest rather than generous. These will be the hours for which you can take sales calls.
Step 17. Add your existing calendar as a conflict calendar#
This is what prevents double bookings.
A connected calendar can act as a conflict calendar, meaning the portal reads what's already on it and blocks those times automatically. Your dentist appointment on Thursday makes Thursday afternoon unbookable without you doing anything.
One catch. Times only get blocked when the event is marked Busy in your source calendar. Events marked Free stay bookable.
Step 18. Book a test appointment#
If DNS is verified, open your own booking link and book a slot.
Check three things. Did it land on your Google or Outlook calendar? Did you get the notification? Did the confirmation email look right and carry your business details?
Then cancel it.
If something goes wrong#
Appointments aren't syncing. Almost always partial permissions. Settings → Integrations → your provider → Reconnect, and accept everything.
You're getting double booked. Your other calendar isn't set as a conflict calendar, or its events are marked Free instead of Busy.
Domain verification keeps failing. Check the host field first. It's the subdomain only. If that looks right, check whether your registrar appended your domain automatically.
Domain says already connected. It's attached to another account somewhere and has to be removed there first.
The email domain says it is already pointing to an email server. mail. already has MX or SPF records from another service. Remove those records on mail. only, then add the domain again.
Emails are going to spam. Check that mail. shows as verified in Part 4 first. If it does, it is usually an incomplete business profile. Go back to Part 2 and fill in every field, particularly the physical address.
You can't find a setting. The portal updates and menus move. Send a screenshot and we'll point at the right place.
What we handle from here#
Pipelines, automations, follow-up sequences, landing pages, lead routing and reporting.
You handled the five things above because they're tied to accounts, details and domains you own. That's deliberate. It means everything built here stays yours.
Anything unclear, book a call and we'll walk it on a screen share.